

Quick Summary
The best axle weld kits are judged by how the finished housing holds up under trail loads, so the right kit keeps geometry and housing straightness predictable. Start by identifying whether you are buying a bare housing, a complete assembly, or weld-on reinforcement parts, then confirm fitment before you order.
- Confirm the third-member pattern and center before ordering any housing.
- Measure tube inside diameter with calipers before buying flanges to avoid a poor weld fit.
- Mock up axle ends, brackets and pinion angle before welding any housing.
- Identify the tube alloy first, since chromoly usually needs matching filler and preheat.
- Drill and tap breather fittings before final welding to avoid distorting the tube.
Table of Contents
- What Makes an Axle Weld Kit Worth Buying
- How Axle Weld Kits Differ: Kit Contents and Fitment Compatibility
- Comparing 4XNation Axle Housings and Weld-In Parts by Build Type
- Toyota Axle Weld Kit Options and Fitment Notes
- DIY Axle Truss Kit and Reinforcement Geometry
- Step-by-Step: Welding an Axle Housing Safely
- Choosing Off-Road Axle Brackets and Your Next Parts Order
- Frequently Asked Questions
What Makes an Axle Weld Kit Worth Buying
Last Updated: October 28, 2026
Best off road axle weld kits are judged by what the finished housing does under load on the trail. A kit earns its place when it removes guesswork about geometry and keeps the housing straight.
Start by considering who will weld it. Check the product listing for the housing and parts you plan to use.
The 4XNation TOY60 Toyota Front Dana 60 Axle Housing is listed at $2,500.00. It is a heavy-duty front housing for solid-axle-swap Toyota trucks and 4Runners, combining a high-pinion Dana 60 center with 3.5-inch OD by .375-inch wall DOM tubes. It is sold as a bare housing for custom suspension bracket and perch placement.
Other points to weigh before you buy:
- Tube wall and OD: Check that the tube dimensions match any flanges or trusses you add.
- Fitment notes: Check the vehicle listed for each part before ordering, not after.
Prices in this guide are listed in USD.
How Axle Weld Kits Differ: Kit Contents and Fitment Compatibility
Most search results for off-road axle weld kits blur three products: complete axle assemblies, bare housings, and weld-on reinforcement parts. A true weld kit sits in the middle, housing, tube, flanges, trusses, brackets and bungs you weld together yourself. Define which category you are shopping in, because a $2,500.00 bare housing and a $123.20 truss are not substitutes.
What a weld kit typically includes
A complete weld kit for a solid-axle off-road build usually contains some combination of:
- Housing or bare tube, the main structure, either a finished housing with a center section or a bare DOM tube you cut to width.
- Face plate or flange, the machined plate that accepts the third member or axle-end flange.
- Truss or reinforcement, a welded structure that ties the top and bottom of the tube together.
- Brackets and mounts, spring perches, link mounts, shock tabs, and track-bar mounts.
- Bungs and fittings, weld-in fill, drain, and breather fittings, often 3/4-inch NPT or 5/16-18 threaded.
- Hardware and instructions, studs, bolts, and a documented weld sequence.
Anything not in that list, bearings, axle shafts, brakes, third member, seals, is a separate purchase. Budget for those first, because a bare housing that looks affordable can double in cost once the rotating assembly is added.
Fitment compatibility: the four checks to run before you buy
Check the fitment details for every part in your cart:
- Third-member pattern. The 4XNation 8.75-inch bare tube housing, at $1,373.90, accepts standard Toyota 8.75-inch third members; the TOY60 housing, at $2,500.00, has a high-pinion Dana 60 center. You can browse the full range of axle housings to compare options by build type. Confirm the center you plan to run before ordering either.
- Tube OD and wall. Serious tube housings commonly use 3.5-inch OD by .375-inch wall DOM. Flanges, trusses and brackets are sized to that tube. The Toyota Semi Float Flange pair, at $149.99, is listed for 3.5-inch by .375-inch tube or 2.75-inch tube ID, measure your tube ID with calipers before buying, because a mismatch will not weld cleanly.
- Overall width and cut-to-length. The 8.75-inch bare tube ships 72 inches long with a 3/8-inch face plate machined flat after welding. The listing notes that it requires cutting and mock-up of axle ends and brackets before welding.
- Vehicle-specific bracketry. The Toyota Pickup Rear Back Truss 86-95, at $123.20, is listed for Toyota Mini Truck 8-inch axles from 1986-1995. The Axle Upper Link Mount for Toyota mini front axles from 1979 to 1985, at $30.80, has a 2.625-inch inside mounting width.
A simple fitment checklist
Before you buy a weld-in part, check the product listing for its fitment and specifications.
Comparing 4XNation Axle Housings and Weld-In Parts by Build Type
Different builds call for different starting points. The table below summarizes where each 4XNation housing and weld-in part fits, using only the listing specifications.
| Product | Price (USD) | Best Fit Build |
|---|---|---|
| TOY60 Toyota Front Dana 60 Axle Housing | $2,500.00 | Solid-axle-swap trucks and 4Runners |
| Toyota 9.5" Land Cruiser Axle Housing | $1,428.90 | Extreme-duty builds |
| Toyota Tundra 10.5" Axle Housing | $1,373.90 | Extreme builds needing a larger housing |
| Toyota 8" Axle Housing | $1,373.90 | Serious rear-axle builds |
| Toyota 8.75" Axle Housing (Bare Tube) | $1,373.90 | Custom-width fabricated builds |
| Toyota Pickup Rear Back Truss 86-95 | $123.20 | Reinforcing Toyota mini truck 8" housings |
| Toyota Semi Float Flange, Pair | $149.99 | Custom housing flange mounting |
The 8.75-inch bare tube housing ships at 72 inches long and requires cutting to the desired width. The 9.5-inch Land Cruiser housing weighs 120 lbs, and its listing recommends professional installation.
Toyota Axle Weld Kit Options and Fitment Notes
The Toyota-specific housings split by model family. The 8-inch and Tundra 10.5-inch housings are complete axle housings that need additional components for final assembly, so budget for bearings, axle shafts, brakes and third member separately.
The Toyota mini truck rear back truss is listed for Toyota Mini Truck 8-inch axles from 1986 to 1995.
Watch out: several housings in this line list weld-in fill and breather fittings that require drilling and tapping. Do this before the housing is final-welded, not after, or you risk distorting the tube.
DIY Axle Truss Kit and Reinforcement Geometry
The 4XNation rear back truss listing describes a crowned-back design and says it is intended to help keep the axle straight under heavy loads.
The Toyota Mini Front Truss is one option for front builds; the matching housing depends on your suspension geometry. Lay the truss against the housing with clamps first and confirm clearance for brakes, the driveshaft and any cross-member before welding. If you are considering this build, you can see the available weld-together truss kits.
Step-by-Step: Welding an Axle Housing Safely
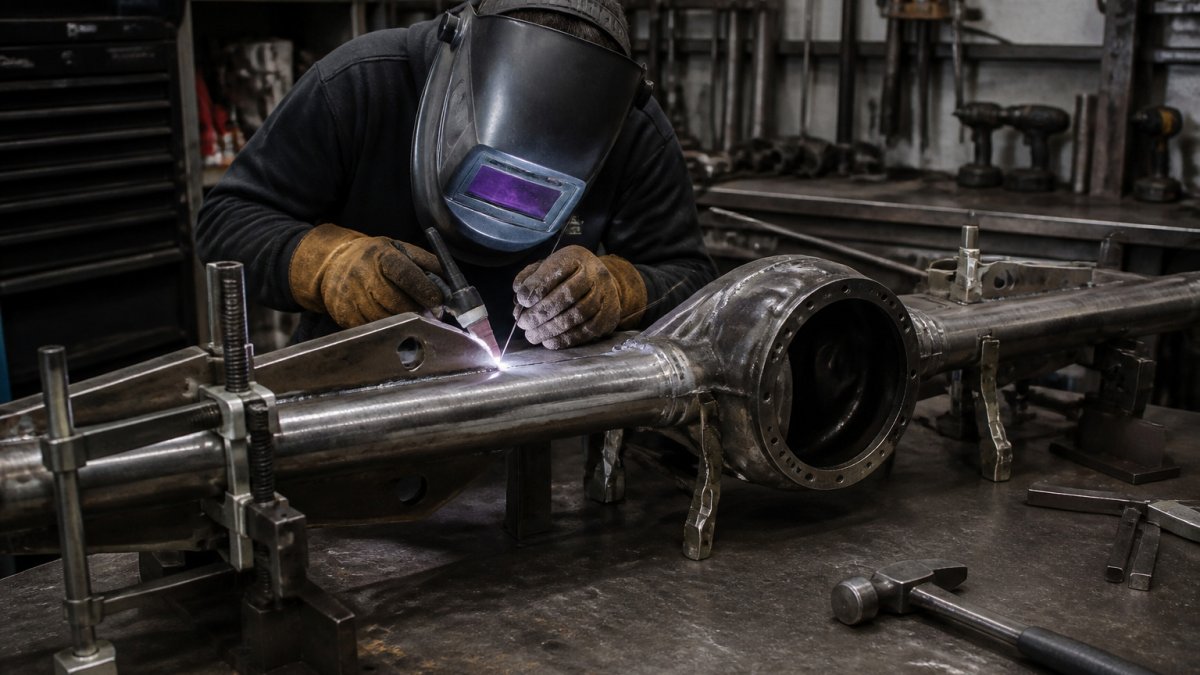
Welding an axle housing is safety-critical. A housing that warps, cracks, or loses pinion angle can fail on the trail. These steps cover material identification, preheat, distortion control, and post-weld inspection.
Before you strike an arc
- Identify the material. Axle housings are commonly mild or low-alloy steel, but some aftermarket tubes are chromoly. Confirm the alloy from the seller or with a magnet and spark test before choosing filler. Chromoly usually needs matching filler and preheat; mild steel welds with standard ER70S-6 wire.
- Read the housing instructions first. The 8.75-inch bare tube ships with a required note: mock up axle ends, brackets and pinion angle before welding. Follow the seller's sequence, it is written around the specific geometry of that housing.
- Clean the steel. Remove paint, rust, oil, and mill scale from every weld joint. Grind to bright metal. Contamination is the most common cause of porosity and lack of fusion.
- Fixture the parts. Clamp the tubes and face plate square so the housing does not move during welding. A simple jig or a set of heavy clamps and a flat table is enough for a home garage, but the housing must not shift once you start.
Weld sequence and distortion control
- Tack first. The rear back truss listing recommends starting in the middle with 4-inch welds on top and bottom, then heavy tacking, followed by 3-inch stitches alternating top to bottom from outside in.
- Run the weld sequence. Alternate sides and work from the middle outward. Keep stitch lengths short and let each pass cool before the next. On a long tube, a back-step sequence, welding short segments in the opposite direction of travel, further limits distortion.
- Control heat on thin sections. Trusses and brackets are often 3/16-inch or 1/4-inch steel, while the tube may be .375-inch wall. Adjust amperage and travel speed so you do not blow through the thinner part or leave cold lap on the thicker one.
- Install the fill and drain bung. The 3/4-inch NPT weld-in bung is cut and welded in. Drill and tap the breather vent to 5/16-18 as needed. Do this before the housing is final-welded, not after, or you risk distorting the tube.
Post-weld inspection
- Let it cool slowly. Do not quench. Rapid cooling can harden the weld zone and promote cracking, especially on low-alloy steel.
- Inspect every weld. Look for undercut, porosity, cracks, and incomplete fusion. A dye-penetrant check on critical joints is cheap insurance on a part that sees trail loads.
- Measure runout and pinion angle. Check the face plate for flatness and the tube for straightness. If the listing calls for machining or squaring the face plate after welding, do it now. Recheck stud torque once the housing is cool.
Choosing Off-Road Axle Brackets and Your Next Parts Order
The Axle Upper Link Mount at $30.80 fits Toyota mini truck front axles from 1979 to 1985 and is made from 1/4-inch steel.
Before you check out, check the listed specifications for the housing, truss or flanges, brackets, and other parts you plan to use.
If you have a question about fitment, contact the team before ordering.
Frequently Asked Questions
What should I look for in an off-road axle weld kit?
Check the product listing for the housing or tube dimensions, fitment, and included parts. For example, the 8.75-inch bare tube housing listing specifies a 3/8-inch face plate and says cutting and welding are required. Compare the listed price and specifications with your build requirements.
Are axle weld kits universal?
The listed parts have specific fitments. The Toyota Semi Float Flange pair is listed for 1979-1995 Hilux Pickup, 1984-2001 4Runner, 1993-1998 T100, and 1995-2001 Tacoma non-ABS models. Check the product listing against your vehicle before ordering.
Can you weld brackets directly to an axle housing?
The Toyota Pickup rear back truss listing specifies full-length welding and recommends starting in the middle with 4-inch welds on top and bottom, then heavy tacking, followed by 3-inch stitches alternating top to bottom from outside in.
Do axle weld kits require professional installation?
The 8.75-inch bare tube housing ships at 72 inches and requires cutting to the desired width. Its listing specifies a weld-in 3/4-inch NPT fill/drain bung and a breather vent requiring drilling and tapping to 5/16"-18. The 9.5-inch Land Cruiser housing weighs 120 pounds, and its listing recommends professional installation.

0 comments