

Last Updated: October 25, 2026
Quick Summary
To prevent axle breakage, inspect CV boots and axle shafts before and after every trail run, reinforce your axle housing with trusses and gussets, upgrade to forged chromoly shafts if running larger tires or aggressive modifications, and master smooth throttle control to avoid shock loading that breaks shafts.
- Shock loading from sudden throttle or impact is the biggest killer of off-road axle shafts
- A torn CV boot can fail completely within weeks of regular driving if not repaired immediately
- Inspect axles every 5,000 miles or after 3 hard trail days for boots, u-joints, seals, housing cracks, and fasteners
- Reinforce axle housing with trusses and gussets before adding tire size, lift, or power modifications
- Larger tires increase rotational mass and leverage on the axle; plan regearing and shaft upgrades together
Table of Contents
- Understanding Common Causes of Axle Failure
- How to Inspect CV Axles Before and After Trail Runs
- How Long Do CV Axles Last with Proper Maintenance
- Off-Road Axle Maintenance and Prevention Steps
- How to Prevent Axle Breakage Through Smart Modifications and Setup
- Building Your Pre-Trail Axle Inspection Checklist
- Frequently Asked Questions
Understanding Common Causes of Axle Failure
Axles fail for predictable reasons: shock loading, metal fatigue, or grease loss, not factory defects. Understanding these causes is essential to prevent axle breakage.
Shock Loading and Impact Damage
Shock loading is the biggest killer of off-road axle shafts. Hitting a rock, pothole, or ledge under throttle creates a torque spike the metal can't absorb.
Think of it like this: normal driving loads the axle gradually. A study examining damage to rear-axle shafts found that severe impact load occurs when the clutch pedal is released suddenly while the vehicle is loaded SAE Mobilus case study on axle shaft strengthening.
The worst scenarios:
- Hitting a hidden rock at speed while accelerating
- Dropping into a rut with the throttle open
- Climbing over an obstacle and losing traction suddenly
Metal Fatigue from Repeated Stress
Metal fatigue is quieter but just as deadly. Every drive flexes the axle slightly; over thousands of cycles, micro-cracks form until the shaft breaks.
Research published in Engineering Failure Analysis examined common failures in automobile rear-axle housing design and found that metal fatigue is a primary failure mode Engineering Failure Analysis journal. The shaft doesn't fail from one big hit, it fails from accumulated stress over time.
Factors that speed fatigue:
- Oversized tires increasing rotational mass
- Aggressive suspension geometry changing load angles
- Towing heavy loads regularly
CV Boot Failures and Grease Loss
CV boots protect joints from water, grit, and debris. When a boot tears, grease leaks out and dirt gets in; the joint dries, corrodes, and starts clicking within weeks, then fails within months.
Boot failure usually happens from:
- Road debris puncturing the rubber
- Suspension compression tearing the boot
- Age and UV exposure making rubber brittle
Without grease, metal-on-metal contact creates friction and heat until the joint seizes or the axle binds.
How to Inspect CV Axles Before and After Trail Runs
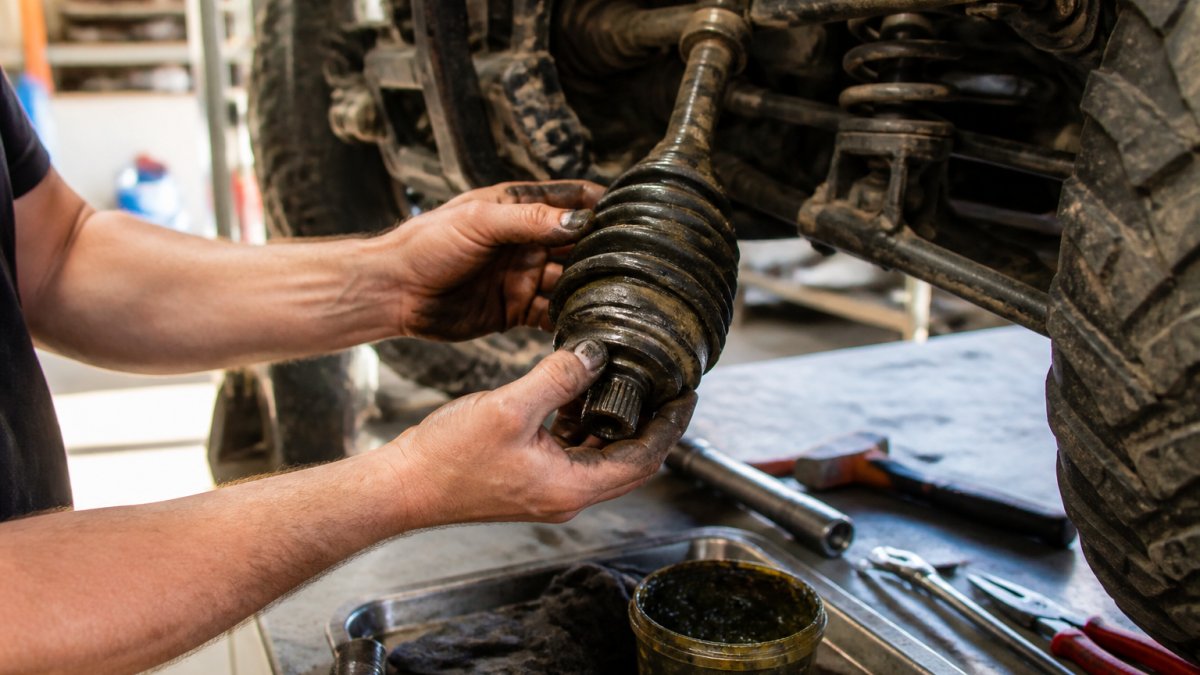
Inspection is the highest-leverage prevention step. A five-minute pre-run check catches a torn boot; a post-run check catches a bent shaft or loose fastener before it becomes a tow bill.
Pre-Run Inspection (5 Minutes, Every Trip)
CV axles (independent suspension):
- Check inner and outer boots for cracks, splits, punctures, and grease splatter on the wheel, knuckle, or lower control arm. Grease outside the boot means the seal is broken.
- Squeeze the boot gently. It should feel firm but flexible. Hard, cracked rubber means age has embrittled it; plan replacement before the next hard trip.
- Grab the axle shaft near the joint and try to move it side-to-side and in-and-out. Slight rotational play is normal; noticeable side-to-side or in-and-out movement means the joint is worn.
Solid axles (front or rear):
- Check the differential pinion seal and axle tube seals for weeping gear oil; a wet, dirty seal is a leak.
- Inspect axle tubes for dents, bends, or cracks, especially near the spring perches and knuckles.
- Check differential cover bolts and drain/fill plugs for tightness and seepage.
Off-road axle shafts (aftermarket or heavy-duty):
- Check splines where the shaft enters the differential or hub for wear, twisting, or chipped teeth.
- Inspect the shaft for a twist mark or bright ring where it has yielded. A twisted shaft is about to break.
- Verify truss, gusset, or reinforcement hardware is tight and free of cracked welds.
Post-Run Inspection (5 Minutes, Every Trip)
- Re-check boots for fresh grease splatter. A boot that survived the pre-run check can tear on the trail from suspension compression or debris.
- Look for fresh mud packed into the boot accordion. Packed grit grinds the boot from the inside.
- Check the axle housing and tubes for fresh cracks, especially around welds and mounting points.
Interval-Based Inspection Schedule
Use this baseline and shorten intervals for hard use.
| Interval | What to Do |
|---|---|
| Every trip (pre and post) | Boot visual and squeeze check, grease splatter check, fastener check, listen for new noises |
| Every 5,000 miles or after 3 hard trail days | Full underbody inspection: boots, u-joints, seals, housing cracks, shaft splines, reinforcement hardware |
| Every 15,000 miles | Grease u-joints and check differential fluid level and condition; inspect CV boots closely for age cracking |
| Annually or before a major trip | Professional alignment check, driveline angle check if lifted, full fastener torque check on reinforcements |
Repair vs. Replace Thresholds
- Torn CV boot, joint still quiet: Replace the boot and repack with grease if caught early. If the joint clicks or has noticeable play, replace the axle assembly.
- Grease loss with contamination: If dirt has entered the joint, replacement is the reliable choice; cleaning and repacking rarely lasts.
- Clicking on turns: The joint is worn. Replace the axle; driving on it accelerates wear and can leave you stranded.
How Long Do CV Axles Last with Proper Maintenance
CV axles typically last 80,000 to 120,000 miles on the highway; off-road use cuts that in half or more.
With regular boot inspections, clean grease, and careful driving, expect 150,000 miles or more. Without maintenance, expect 40,000 to 60,000.
The real variable is how you drive: smooth inputs and careful line selection preserve axles; hard throttle and shock loading destroy them fast.
Off-Road Axle Maintenance and Prevention Steps
Reinforce Your Axle Housing
Under heavy load or impact, the axle housing flexes, bending the shaft or stressing the CV joints.
The Toyota Pickup Rear Back Truss is designed specifically for 8-inch Toyota axles.
The Toyota Mini Front Truss runs the full length of the front axle tube for maximum flexibility across suspension setups.
Toyota Pickup Rear Back Truss 86-95 →
The Toyota Knuckle Gussets eliminate knuckle failure concerns during hard trail use.
Upgrade to Stronger Axle Shafts
Factory axle shafts are engineered for street use and break regularly off-road.
Forged 4340 chromoly shafts dramatically improve durability. The Branik Motorsports 2005-2016 Ford Super Duty 4340 Chromoly Axle Kit offers complete front-end upgrades at $1,195.99. Chromoly absorbs shock loads better and resists fatigue longer; forged, not cast, makes it tougher.
Master Driving Techniques to Avoid Shock Loading
The best axle reinforcement is smooth throttle control. Shock loading happens because of driver input, not the vehicle.
Techniques that preserve axles:
- Modulate throttle when climbing obstacles
- Avoid sudden throttle release while turning
- Use low-range gearing to maintain traction without spinning wheels
In 4Lo, use torque and traction to climb smoothly; aggressive throttle transfers shock directly to the drivetrain.
How to Prevent Axle Breakage Through Smart Modifications and Setup
Modifications decide prevention. A stock axle on stock tires is a matched system; change one part and you change loads downstream. Understand which mods increase axle stress and what supporting changes keep the system reliable.
How Tire Size and Weight Change Axle Load
Larger tires affect axles three ways: rotational mass, leverage, and gearing.
- Rotational mass: A heavier tire and wheel takes more torque to accelerate and more braking force to stop, and that torque passes through the axle shaft every time you leave a stop or climb.
- Leverage: A larger tire diameter gives the tire more leverage over the axle; the same engine torque produces higher shaft stress because the tire is effectively a longer wrench.
- Effective gearing: Larger tires raise the effective final drive ratio, making the vehicle feel sluggish and tempting more throttle, which means more shock load when traction changes.
A modest tire increase is fine on a stock axle with careful driving; a large increase without regearing and shaft upgrades is a known recipe for breakage. Plan regearing and stronger shafts together.
Lift Kits, Suspension Geometry, and CV Joint Angles
A lift changes CV joint operating angles and solid-axle pinion angles.
- CV axles: Lifting increases the CV joint operating angle. Running near the design limit increases heat, wear, and binding risk at full droop or compression; a lift too tall for the axle is a common cause of premature CV failure.
- Solid axles: A lift changes the pinion angle; a wrong angle makes u-joints run at a binding angle, causing vibration and accelerated wear. Correct it with adjustable control arms or shims.
- Droop and compression: Long-travel suspension can over-extend a CV axle at full droop; check that it doesn't bind or pull apart at full extension.
Before installing a lift, confirm the maximum lift the axle design can tolerate and plan a driveline angle correction if the lift is significant.
Alignment, Worn Suspension, and Axle Stress
Alignment and suspension condition are often overlooked axle stressors.
- Worn ball joints, tie rods, and control arm bushings let the wheel move under load, changing the axle angle dynamically and adding stress. A worn front end on a lifted vehicle is harder on CV axles than a tight one.
- Improper alignment (excessive camber or toe) side-loads the tire and drivetrain and causes uneven tire wear, which changes effective rolling diameter and makes one wheel work harder.
- Worn shocks allow excess suspension cycling and wheel hop, a shock-load generator.
Fix worn suspension and alignment before adding power or tire size, a tight, aligned front end is cheaper than an axle replacement.
Gearing, Torque, and Shock Load
Lower gearing multiplies torque at the wheels, good for crawling, bad for axle shafts if the rest of the system isn't upgraded.
- Regearing for larger tires restores effective ratio and reduces the temptation to use excessive throttle, which can actually reduce shock load.
- Very low gearing with stock shafts increases the torque the shaft must carry; pair aggressive gearing with stronger shafts.
- Engine and throttle modifications that increase low-end torque raise the load on the entire drivetrain. Plan supporting upgrades accordingly.
Lockers, Traction Devices, and Torque Spikes
A locking differential sends torque to both wheels, great for traction, harder on axle shafts.
- When a locker engages, torque can spike instantly if one tire is bound or if the driver is on the throttle. That spike is a shock load.
- Lockers break stock axle shafts more often than open differentials because the shaft loses the escape valve of a spinning tire.
- Run lockers with upgraded shafts and engage them smoothly, off the throttle, before the obstacle rather than during it.
A Modification Order That Preserves Axles
A sensible build sequence for trail use:
- Fix worn suspension, steering, and alignment first.
- Add traction (lockers) only with upgraded shafts planned or installed.
- Regear when tire size increases enough to change effective ratio significantly.
- Add lift with driveline angle correction and check CV joint angles at full droop.
- Reinforce the housing (truss, gussets) before adding power or tire size beyond stock.
- Upgrade shafts last, after geometry and loads are understood, so you buy the right strength for the actual use.
Building Your Pre-Trail Axle Inspection Checklist
Run this checklist before every trail run, five minutes catches problems early.
| Inspection Point | What to Check | Action if Failed |
|---|---|---|
| CV boots | Tears, splits, grease leaks | Replace axle before trail |
| Grease color | Bright yellow or light tan | If brown or black, inspect joint |
| Joint play | Wiggle axle by hand for side-to-side movement | Replace if movement is excessive |
| Noises | Listen for clicking or clunking on short test drive | Inspect boot and joint, replace if needed |
| Housing cracks | Visual inspection of axle housing for cracks | Do not trail until repaired |
| Fasteners | Bolts holding housing reinforcements tight | Tighten any loose bolts |
Run it at home, not on the trail. Fix any failure before you leave, a broken axle miles from help is a long walk.
Frequently Asked Questions
What causes an axle to break during off-roading?
Axles break from sudden shock loading when you hit obstacles at speed, metal fatigue from repeated stress cycles, and CV boot failures that allow grease to escape and grit to enter the joint. Research shows severe impact loads, like releasing the clutch suddenly while loaded, can cause twisting damage. Potholes, rocks, and wheel hop all apply shock loads that exceed the axle's design limits, especially on unmodified factory axles.
How often should you inspect CV axles to prevent failure?
Inspect CV axles before every trail run and after any hard impact or obstacle crossing. Check the rubber boots for tears or grease leakage, listen for clicking when turning, and look for visible cracks in the axle shaft. If you regularly off-road, inspect monthly. After extreme terrain, rock crawling, deep water crossings, or high-speed desert runs, inspect within 24 hours. Early CV boot damage caught during inspection prevents complete axle failure.
How long do CV axles last with proper maintenance?
Factory CV axles typically last 50,000 to 100,000 miles under normal driving. Off-road use shortens this significantly, expect 10,000 to 30,000 miles of heavy trail use depending on terrain severity and your vehicle's setup. Upgraded 4340 chromoly axles and reinforced housings extend lifespan considerably by handling shock loads better. Regular inspection, boot maintenance, and smart driving techniques maximize whatever axle you run.
Can upgrading to reinforced axles really prevent breakage?
Yes. Reinforced axle housings like trusses prevent distortion under load, which is a primary cause of shaft failure. Upgrading to 4340 chromoly shafts increases strength and fatigue resistance compared to factory steel. Combined with proper welding sequence and reinforcement gussets, these upgrades eliminate many common breakage points. 4XNation's TOY60 axles and truss kits are tested on real rigs before sale.
Axle breakage doesn't have to happen. Prevention works. Reinforce your housing, upgrade your shafts, inspect regularly, and drive smart. These steps keep you rolling when others are calling for a tow. Browse Axles Drivetrain to explore the upgrades that fit your rig.

0 comments