

Last Updated: October 24, 2026
Quick Summary
Custom fabrication for Toyota axles starts at about $925 for a bare builder housing, with the 9.5-inch version at $999 and a Toyota 8.75-inch bare tube housing at $1,373.90. Housing, shafts, internals, and labor drive the total, and labor is the most underestimated cost center.
- Builder housings arrive as bare tubes with inner seals and third-member hardware, ready for your chosen ends.
- Thirty-spline Toyota setups are a common upgrade for rigs running 35-inch tires and up.
- Fixture the housing to a straight bar or jig before welding a truss to prevent a bent axle.
- The 8.75-inch bare tube housing ships at 72 inches total and is meant to be cut to your width.
- Spec the third member before buying shafts, since gear ratio and locker affect shaft length.
Table of Contents
- What Drives the Cost of Custom Fabrication for Toyota Axles?
- Picking a Toyota Axle Weld Kit and Fabricated Housing
- Custom Toyota Axle Shafts: Splines, Steel, and Strength
- Why a Toyota Rear Axle Truss Belongs in the Build Plan
- Toyota Axle Fitment: Measuring Before You Cut and Weld
- Build or Buy? Planning Your Axle Order With 4XNation
- Frequently Asked Questions
What Drives the Cost of Custom Fabrication for Toyota Axles?
Custom fabrication for Toyota axles runs from about $925 for a bare builder housing. At 4XNation, we quote builds around four cost centers: housing, shafts, internals, and labor. Most first-time builders underestimate the last two.
The housing is the biggest single line item. A fabricated shell with thick DOM tubes and a machined face plate costs far more than a stock take-off.
Housing, Shafts, and Labor: Where the Money Goes
Housing cost tracks steel thickness and machining time. Our 8" Diamond builder housing runs $925, and the 9.5" version runs $999, both with 3.5" tubes at 3/8" wall.
Shafts are the second variable. Spline count, material, and joint type set the price.
Labor is where budgets quietly break. Cutting, fixturing, and welding a housing straight takes hours, and a shop that rushes it hands you a bent axle.
| Cost Center | What Sets the Price | Typical Share of Budget |
|---|---|---|
| Housing | Steel thickness, machining, gusseting | Largest single item |
| Shafts and joints | Spline count, 300M vs. 4340 | Second largest |
| Third member and locker | Gear ratio, E-locker choice | Varies widely |
| Labor and welding | Fixture time, truss and link work | Most underestimated |
Picking a Toyota Axle Weld Kit and Fabricated Housing
Start with the housing, because everything else bolts to it. A Toyota axle weld kit only works if the tube diameter, wall thickness, and flange interface match your housing, so buy those two together.
Builder housings arrive as bare tubes with inner seals and third-member hardware, ready for whatever ends you need: Toyota knuckle balls, Dana 44 or Dana 60 knuckles, full float flanges, or semi float ends. Our 8" Diamond builder housing and 10.5" Diamond builder housing follow that pattern, and the Toy60 Dana 60 front housing is the direct route to a stronger front end.

Builder Housings vs. Bare Tube Housings
A builder housing is a bare tube with the center section done and the ends left open.
Builder housings suit fabricators who know their width and end configuration; bare tube housings suit anyone who wants the center section sorted before touching a welder.
Weld-in flanges complete the picture. Our Toyota semi float flange pair fits 2.75" I.D. tube and covers 1979-1995 Hilux, 1984-2001 4Runner, 1993-1998 T100, and 1995-2001 Tacoma non-ABS models.

Custom Toyota Axle Shafts: Splines, Steel, and Strength
Shaft strength comes down to three choices: spline count, material, and joint design. More splines spread load across a larger effective diameter, and 300M steel tolerates shock loads that 4340 eventually fatigues under.
Thirty-spline Toyota setups are a common upgrade for rigs on 35-inch tires and up.
A common mistake is buying shafts before deciding on the third member. Gear ratio and locker choice affect shaft length and spline engagement, so spec the diff first.
Why a Toyota Rear Axle Truss Belongs in the Build Plan
A Toyota rear axle truss keeps the housing from bending under big tires and hard landings. The stock 8-inch housing flexes, and flex eventually walks the ring gear out of mesh.
Trusses weld along the top or back of the tube and tie the center section to the outer ends. On a linked setup the truss shares space with link mounts, so plan truss profile, link bracket locations, and shock mounts on paper before the first tack.
Fixture First, Then Weld
The biggest cause of a bent axle after trussing is welding an unrestrained housing. Steel shrinks as it cools, and every weld pulls the tube toward the heat. Fixture the housing to a straight bar or jig, and clamp the flanges so they cannot walk.
A common pattern among experienced fabricators:
- Bolt or clamp the housing to a known-straight reference before any welding.
- Tack the truss in four places, both ends and both sides of the center, then re-check straightness before running a bead.
- Weld in short stitches, alternating sides and moving from the center outward, so heat input stays balanced.
Heat Control and Weld Sequencing
Preheat is not optional on thick truss plate over a thin housing tube. A 3/8-inch truss foot against a 1/4-inch tube wall pulls heat out of the puddle fast, encouraging lack of fusion, so warm the joint with a torch first.
Sequence matters as much as technique:
Toyota Semi Float Flange, Pair →
- Weld the truss feet to the tube first, in short stitches, alternating sides.
- Weld the truss to the center section last, again in stitches, letting the housing cool between passes.
- Never run a continuous bead down one full side. That is the fastest way to bow a tube.
Welding a truss onto a loaded housing without fixturing it pulls the tube out of alignment, and no truss is worth a bent axle. If you cannot fixture it, do not weld it.
Checking Straightness After Welding
Once the housing cools, verify it before installing anything. A straightedge along the tube, a dial indicator on the flange faces, and a pinion angle check against your reference catch most problems. Correcting movement now is far cheaper than discovering it when the ring gear howls.
A truss done right adds stiffness without adding runout. A truss done fast adds weight and a warranty claim.
Toyota Axle Fitment: Measuring Before You Cut and Weld
Measure twice, cut once, and mock up everything before the welder comes out. Toyota axle fitment starts with pinion angle, then width, then bracket placement.
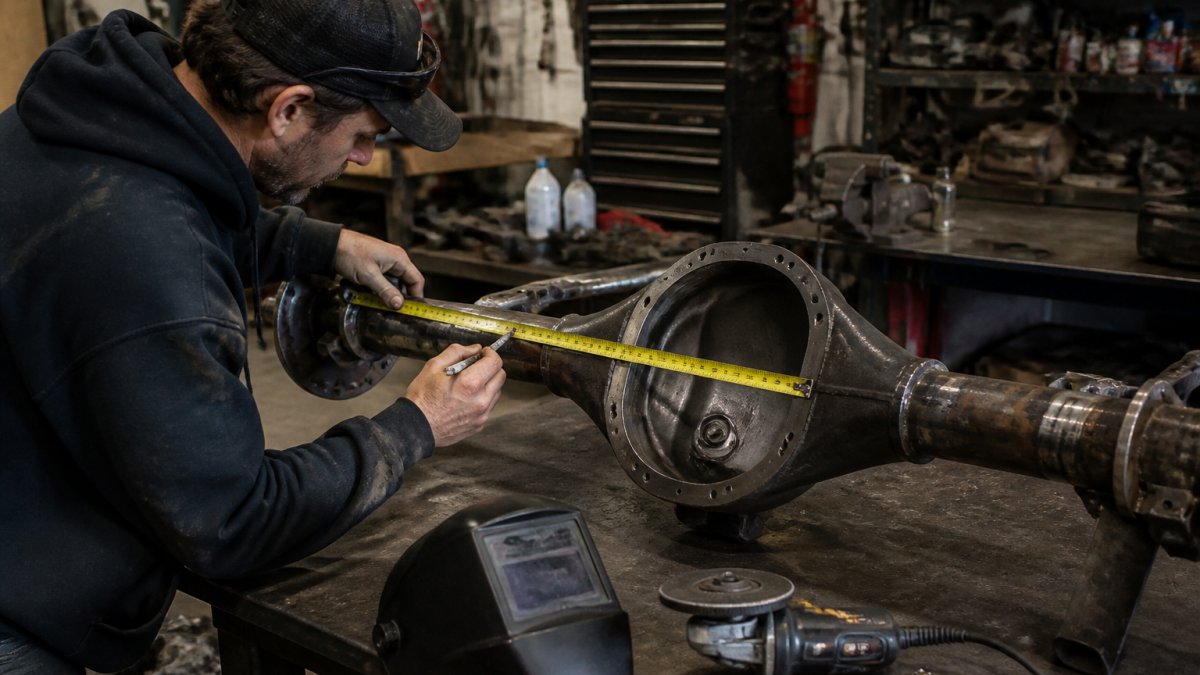
Step 1: Establish Ride Height and Reference Points
Set the housing at ride height with weight on the springs. Measure flange face to flange face, confirm pinion angle against the transfer case output, and mark cut lines from a fixed reference rather than each end.
Housings ship long on purpose. Our 8.75" bare tube housing arrives at 72" total and is meant to be cut to your width. Mock up the axle ends, brackets, and pinion angle before any welding.
Step 2: Cut and Prep the Tube Ends
Cut square, deburr inside and out, and test-fit the end before welding. A tube end out of square by a degree or two shows up as camber or caster error once the knuckle or flange is welded on. Chamfer the edge for penetration and clean mill scale back an inch from the joint, mill scale and paint are the two most common causes of porosity.
Step 3: Align the Ends Before You Weld
This is the step most home builders rush. Set the housing on stands, slide the ends on, and check:
- Flange-to-flange width against your target.
- Pinion angle against the transfer case output.
- Caster on a front housing, measured at the knuckle ball or the flange face.
Tack in four places per end, re-measure everything, then finish weld. If a measurement moved after tacking, cut the tack and start over, cheaper than a bent housing.
Step 4: Weld Sequence and Heat Control
Weld the ends in short stitches, alternating sides, and let the housing cool between passes. A continuous bead around a tube end pulls the tube in the weld's direction. On a front housing, weld the knuckle ball or flange in quadrants, top, bottom, left, right, rather than one pass around the circumference.
Keep a wet rag or a heat sink near the weld zone on thin-wall tube. Drawing heat out of the surrounding metal reduces distortion and keeps the tube from walking.
Step 5: Post-Weld Inspection
After the housing cools, check straightness with a straightedge, verify flange runout with a dial indicator, and re-check pinion angle and caster against your reference. Then leak-check the housing and confirm the third member seats without binding. A housing that passes is ready for shafts and gears; one that does not gets corrected now, not after the first trail ride.
Fitment Checklist
- Confirm ride height and loaded weight
- Measure flange-to-flange width
- Check pinion angle against transfer case output
Build or Buy? Planning Your Axle Order With 4XNation
Build versus buy comes down to time and tooling. If you have a jig, a welder, and patience, a weld kit saves money.
Toyota's own axle production shows how much machining and fixturing sit inside a finished housing. The automaker's planned rear axle plant is a $531 million facility expected to produce 500,000 rear axles annually at full speed in 2027, per the San Antonio Express-News report on Toyota's axle plant.
At 4XNation, we fabricate TOY60 axles in-house and test every part on our own rigs before it reaches the catalog.
Ordering is simple: pick the housing, match the weld kit and flanges to your tube size, then spec shafts against your third member.
Frequently Asked Questions
What parts are needed to fabricate a custom Toyota axle?
A typical build starts with a housing or builder tube, weld-in flanges or knuckle ends, a third member, custom Toyota axle shafts, and a truss or gusseting for reinforcement. 4XNation sells the pieces separately: the Toyota Semi Float Flange pair runs $149.99, the 8-inch Diamond builder housing $925.00, the 9.5-inch Diamond builder housing $999.00, and the 8.75-inch bare tube housing $1,373.90. Add seals, studs, a fill plug, and a breather, then budget for cutting, fixturing, and welding.
How do you choose the right Toyota axle weld kit for a Toyota?
Start with your tube size and the ends you plan to run. The 4XNation semi float flanges are built for 2.75-inch inside diameter tube, matching 3.5-inch x 0.375-inch wall housings, and fit 1979-1995 Hilux, 1984-2001 4Runner, 1993-1998 T100, and 1995-2001 Tacoma non-ABS models. The Diamond builder housings accept Toyota knuckle balls, Dana 44 or Dana 60 knuckles, full float flanges, semi float ends, or portals, so the kit follows the ends you pick rather than the other way around.
Can you build a Dana 60 axle for a Toyota truck?
Yes. The common route is a hybrid housing that pairs Toyota-friendly mounting with Dana 60 outers. The 4XNation Diamond builder housings ship with 3.5-inch, 0.375-inch wall DOM tubing and inner axle seals, and they are ready for Dana 44 or Dana 60 knuckles, Toyota knuckle balls, or full float ends. That lets you keep Toyota link and differential packaging while gaining the larger shaft and joint size a Dana 60 front end provides.
What should you measure before ordering custom axle shafts?
Measure housing width end to end after you settle the final cut, the spline count and length at each inner axle, and the flange or drive slug interface. Confirm the third member you are running, since the 8.75-inch housing accepts standard Toyota 8.75-inch third members. Mock up the axle ends, brackets, and pinion angle before welding, because shaft length is set by the finished housing, not the tube as it ships.
Building a Toyota axle that survives rock crawling is a fitment problem before it is a horsepower problem. Get the housing, tube size, and pinion angle right, and the rest of the build falls into line. 4XNation stocks in-house fabricated TOY60 axles, weld-it-yourself kits, and drivetrain components tested on our own rigs, backed by staff who wheel the same trails. Get started with 4XNation and build an axle you stop worrying about.

0 comments